Imagine this: you're halfway through preparing a batch of fluffy biscuits or delicate scones, your hands are dusted with flour, and then it hits you – the recipe specifically calls for self-rising flour, and your pantry is, alas, bare. Panic sets in. Do you scrap the recipe, or make a last-minute dash to the grocery store? What if we told you there’s a simple, stress-free solution right at your fingertips? Learning how to make self rising flour at home is not just a clever kitchen hack; it’s a true lifesaver that empowers you to bake on demand, ensuring your culinary adventures never get derailed by missing ingredients again.
Homemade self-rising flour is a revelation for any home baker. Not only does it rescue you from those "oops!" moments, but it also gives you complete control over the freshness and quality of your ingredients. Whether you're whipping up classic Southern biscuits, light-as-air pancakes, or a tender quick bread, having this versatile blend ready means you’re always just moments away from delicious, perfectly risen baked goods.
What Exactly is Self-Rising Flour? Unpacking This Baking Essential
At its heart, self-rising flour is a clever pre-mixed combination designed to simplify baking. It’s essentially all-purpose flour with baking powder and salt already incorporated. This ingenious blend means you don’t need to measure out separate leavening agents or salt when a recipe calls for it, streamlining your baking process considerably. The baking powder acts as a chemical leavener, reacting with liquids and heat to produce carbon dioxide bubbles, which in turn make your baked goods light and airy.
This convenient flour blend is particularly beloved in Southern cuisine, where it’s a cornerstone for iconic dishes like impossibly flaky biscuits, moist cornbread, and tender cobblers. Its popularity stems from the consistent rise and tender crumb it imparts, making it an indispensable pantry staple for many. While standard all-purpose flour requires you to add baking powder and salt separately, self-rising flour does all the heavy lifting for you, making it a fantastic time-saver and a secret weapon for achieving baking success. It minimizes the risk of forgetting a key ingredient and ensures a balanced flavor profile and rise every time.
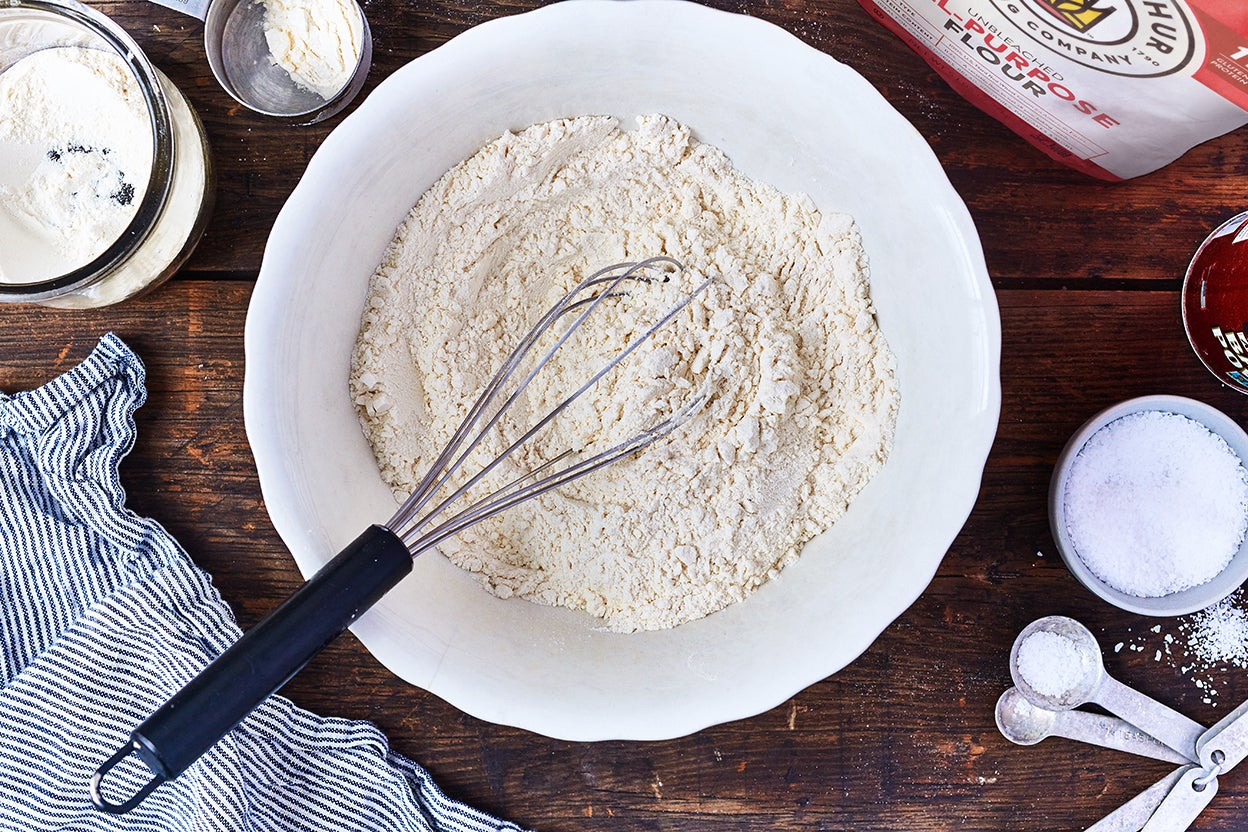
The Simple Recipe: How to Make Self-Rising Flour at Home
You might be surprised to learn that this baking marvel requires only three common ingredients you likely already have in your pantry. Forget fancy specialty flours or extra trips to the store; crafting your own self-rising flour is incredibly straightforward. The magic lies in combining:
- All-purpose flour: The versatile foundation of our blend.
- Baking powder: The essential leavening agent that makes everything rise beautifully.
- Salt: A crucial flavor enhancer that also plays a role in regulating the leavening process.
That’s it! No complex steps, no obscure additions. Just these three simple components, expertly combined, will yield a fresh, effective self-rising flour that’s ready for your next baking project. Many commercial brands of self-rising flour, especially those famous in the South like White Lily, are made with soft wheat flour, which has a lower protein content. This contributes to the incredibly tender texture of their biscuits. While using standard all-purpose flour will work beautifully, a softer wheat all-purpose flour (if you can find one) might yield results closer to these traditional Southern recipes.
Step-by-Step Guide: Crafting Your Own Homemade Self-Rising Flour
Making your own homemade self-rising flour is not just easy; it’s empowering. Follow these simple steps to ensure a perfect blend every time:
- Gather Your Ingredients and Tools: You'll need a large mixing bowl, a whisk or flour sifter, a measuring cup for flour, and accurate measuring spoons for baking powder and salt. For every 1 cup of all-purpose flour, you will need 1 ½ teaspoons of baking powder and ¼ teaspoon of fine salt. This ratio is crucial for proper leavening and seasoning.
- Measure with Precision: Carefully measure out your all-purpose flour. For best results, spoon the flour into your measuring cup and then level it off with a straight edge, rather than scooping directly from the bag (which can compact the flour and result in too much). Then, measure your baking powder and salt accurately. Remember, baking is a science, and precision matters! Using a digital kitchen scale for flour can offer even greater accuracy.
- Combine Thoroughly: This is arguably the most critical step. Add the measured baking powder and salt to your all-purpose flour in the large mixing bowl. Now, either use a whisk to vigorously combine the ingredients for at least 30-60 seconds, or, even better, sift the mixture two or three times. Sifting ensures that the baking powder and salt are perfectly and evenly distributed throughout the flour. Without even distribution, your baked goods might rise unevenly or not at all, leading to disappointing results.
- Store Properly for Freshness: If you're making a larger batch to have on hand, proper storage is key to maintaining freshness and potency. Transfer your homemade self-rising flour to an airtight container. A glass jar with a tight-fitting lid or a sturdy food-grade plastic container works well. Store it in a cool, dry place away from direct sunlight and humidity. Because baking powder loses its potency over time, aim to use your homemade blend within six months. For optimal freshness, many bakers prefer making smaller batches as needed, which is incredibly easy to do. Don't forget to clearly label your container with "Self-Rising Flour" and the date it was made to avoid any kitchen confusion! For more details on this quick and easy process, check out our guide on Never Run Out: Make Self-Rising Flour with 3 Ingredients.
Tips for Self-Rising Flour Success
While the basic recipe for how to make self rising flour is simple, a few expert tips can elevate your results and ensure your baked goods are always spectacular:
- The Power of Fresh Baking Powder: Baking powder is the active ingredient responsible for lift, and it loses its potency over time. Always use fresh baking powder for the best rise. If you're unsure about yours, test it: add a teaspoon to half a cup of hot water. If it fizzes vigorously, it’s good to go! If it barely bubbles, it's time for a new can.
- Adjusting for Larger Batches: If you're a frequent baker, feel free to multiply the recipe to create a larger stash. Just remember to maintain the correct ratios (1 cup flour : 1.5 tsp baking powder : 0.25 tsp salt) and ensure thorough mixing, perhaps even sifting more times for larger quantities.
- Label, Label, Label: This tip cannot be stressed enough! Storing homemade self-rising flour in an unmarked container is an open invitation for kitchen mishaps. Imagine accidentally using it in a recipe that calls for plain flour and additional leavening! Clearly label your container as "Self-Rising Flour" and include the date it was made. You might even add a note about the ratio (e.g., "1.5 tsp BP, 1/4 tsp salt per cup").
- Consider Your All-Purpose Flour: While any standard all-purpose flour will work, some bakers prefer unbleached flour for its slightly different flavor profile and lack of chemical treatments. As mentioned, softer wheat flours (often with lower protein content) will yield a more tender crumb, especially desirable for biscuits and delicate cakes. Experiment to find your preferred base.
- Sifting is Your Friend: Even if you mix with a whisk, an initial sift of the flour before adding the other ingredients, and then another one or two sifts after they're combined, ensures the lightest, most consistent blend.
Beyond the Basics: Self-Rising Flour FAQs
New to the world of homemade self-rising flour? You likely have some questions. Here are answers to common queries that will help you confidently integrate this staple into your baking routine.
Can I use self-rising flour in place of all-purpose flour?
Not always, and often not without adjustments. Self-rising flour already contains leavening agents and salt. If a recipe calls for plain all-purpose flour AND separate baking powder/soda and salt, using self-rising flour directly will result in an over-leavened product that might rise too quickly and then collapse, or taste overly salty. You would need to carefully adjust or omit the additional leaveners and salt from the original recipe, which can sometimes be tricky. It's generally safer to use self-rising flour only when a recipe specifically calls for it, or when you are confident in making the necessary substitutions, typically by removing all other leavening and salt from the recipe.
Is self-rising flour the same as cake flour?
No, they are distinctly different. While both can contribute to tender baked goods, cake flour has a significantly lower protein content (typically 7-8%) compared to all-purpose flour (10-12%) and self-rising flour. This lower protein content in cake flour results in a much finer, more delicate crumb, ideal for light and airy cakes. Self-rising flour, on the other hand, is primarily defined by the inclusion of leavening and salt, not necessarily by a specific protein content of the base flour (though some brands use softer wheat). For an easy guide to incorporating this into your daily baking, refer to DIY Self-Rising Flour: Your Easy Guide to Fresh Baked Goods.
Can I use whole wheat flour instead of all-purpose to make self-rising flour?
Yes, you can, but be prepared for a difference in texture and taste. Whole wheat flour contains the bran and germ of the wheat kernel, making it denser and higher in fiber. When used in place of all-purpose flour for self-rising flour, your baked goods will likely be heavier, denser, and have a distinct nutty flavor. The rise might also be slightly less robust due to the added weight and structure of the whole wheat flour. It's a great option if you prefer whole grains and a heartier texture, but it won't yield the same light and fluffy results as all-purpose based self-rising flour. You might also need a touch more liquid in your recipe.
What about gluten-free self-rising flour?
You can certainly adapt this recipe for gluten-free baking! Simply use a high-quality gluten-free all-purpose flour blend as your base. Ensure your chosen blend contains xanthan gum (or add a small amount separately, typically ¼ teaspoon per cup of flour) to help with structure, as gluten-free flours lack the binding properties of wheat. The ratios for baking powder and salt remain the same. Always check that your gluten-free flour blend is suitable for general baking.
Conclusion: Empower Your Baking with Homemade Self-Rising Flour
No more mid-recipe panics or last-minute grocery runs! Learning how to make self rising flour is an invaluable skill for any home baker. It’s incredibly easy, cost-effective, and gives you total control over the freshness and quality of your ingredients. From flaky Southern biscuits to delicate quick breads, having this simple three-ingredient blend ready in your pantry ensures you're always prepared for delicious baking adventures.
So, the next time a recipe calls for self-rising flour, skip the store-bought version and whip up your own. Not only will you save time and money, but you'll also experience the satisfaction of baking with ingredients you’ve personally prepared. Embrace this kitchen hack and elevate your baking game—because homemade truly always tastes better!
